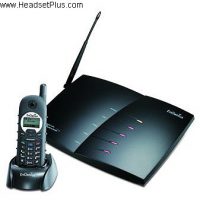
EnGenius DuraFon 4X FAQ
Q. How far does the Engenius phone system go? Is there a difference with 2 way radio handset to handset versus base communication?
A. Our claimed range is as follows: Up to 250,000 sq. ft. in a warehouse, up to 3000 acres in an open outdoor area, and up to 12 floors in building. This range is assumed using base to handset communication. The 2 way / broadcast from handset is less than a typical incoming call using the base station. Range can be 25% to as much as 75% less. The actual range of the 2 way and broadcast varies just as does our base to handset communication, based on environment.
Q. How can you tell which model handset I have?
A. Remove the battery to verify model and serial number.
Q. How do I register handsets to multiple EnGenius DuraFon 4x bases?
A. A handset can only be registered to one base at a time. If you need multiple base registration, go with the Durafon PRO.
Q. Can the handset be used out of the box without the base unit for 2 way radio?
A. No, handsets require registration ID’s from the same base unit to receive 2 WAY, or broadcasts.
Q. What is the difference between the 4x system and the EnGenius PRO system?
A. The additions to the PRO include:
Speakerphone capability of the PRO handsets.
Multiple base registration (allowing 2 way / broadcast with all, up to 8 total base units), where 4x is limited to base specific.
Broadcast through a line port.
Q. Is there a range difference between models 1x, 4x, and PRO?
A. No, they both perform the same as far as range.
Basic Troubleshooting
First and foremost, if you encounter any issues with the system, do a power reset on both handset(s), and base station.
**How to turn off line detection (if getting the “no lines avail” prompt)
From an admin handset (id 10, or 11), press Menu, 9,2,5, then select “off”.
(Ref #1) Registering handsets: First power-up the base for at least 15 seconds. Now press the register button on the base and hold it until all line lights illuminate. (The button is located on the side that the antenna is attached to, blue in color and letters REG on it) Next, press menu on the handset followed by 6 (register) and 1(register) during the time the lights are lit on the base unit. The display will say register and then new ID. The ID of the handset will be 10 for the first handset registered to base, and will go in consecutive order there after (11, 12, 13 etc.). Up to 90 handsets can be registered to the base. Keep in mind that ID 10 and 11 are the “Administrative handsets”. These handsets have more options than the other handsets. They can dedicate phone lines to specific handsets, turn the auto attendant on or off, and clear or assign ID’s to other handsets.
(Ref #2a) Resetting a handset serial numbers below 071100601: Press menu, * # # *, then 7 (Factory), then 1 (Clear all). The screen will say “cycle power” press the left soft key for OK. After this you will turn the handset off with the bottom left power key and then back on with the same key.
(Ref #2b) Resetting a handset serial numbers above 071100600: Press Menu, 5, star, then 1 (clear all), then power recycle.
(Ref #3) Deregistering a handset: Same procedure as Ref #1, except press menu 6, 2 on the handset. The handset will display “Deregister” The ID of the handset is now removed from the base and the handset. Note, if you can’t deregister the handset because the handset is damaged, please go to Ref #9 after it has been repaired.
(Ref #4) Base station won’t go into registration mode: Make sure only the power light is on with the base station. Do a power reset on the base station. Lastly, reset the base and try again.
(Ref #5) Resetting the base: (required if you no longer have Id 10, or 11 admin handsets and you need to do setting changes) First power-up the base for at least 15 seconds. (Wait until after line lights flash.). You will now need to press the reset button which requires a narrow object with a point, such as a pen or paperclip. The reset button is located on the side of the base that the antenna is attached to, next to the blue register button with the letters RST beneath it. Hold this button down until the line 1 and line 2 lights up, then you can let go of the button. The base is now reset. (Registration will now start at 10 again)
(Ref #6) Dedicating lines to a specific handset: By default all incoming calls will ring all handsets. To program line dedication to a specific line you must use an administrative handset (ID 10, or 11). You need to choose the line, and then the handset id it will be dedicated to. Note, as you dedicate one line to a handset, the other remaining lines still have “all handsets” going to them, including the dedicated handset. You will need to dedicate all lines to have complete direct dialing to each handset exclusively.
With the administrative handset, press Menu, 9, 1, then 4. Use the up/down arrows to choose the line accordingly you wish to dedicate and the handset id it goes to.
NOTE: By resetting the base (the tiny button next to the “REG” button) you will erase all registration and administrative changes including line dedication of handsets.
NOTE: If you wish to dedicate more than one handset to a line, you must use grouping instead (see Ref #7).
(Ref #7) Dedicating line ports to Groups:
Grouping is similar to line dedication but now you will be dedicating a line to a group instead of a line to a specific handset. This later will allow individual handsets to be added to the group or groups which in turn mean access to the lines the group is within.
See #6, and now choose 01-07 (group number) instead of the handset id on the end of step #2. Below is a typical scenario arrangement.
Group 1 = Line 1 = Programming # = 01
Group 2 = Line 2 = Programming # = 02
Group 3 = Line 3 = Programming # = 03
Group 4 = Line 4 = Programming # = 04
Note, out of the box no handsets are part of any groups. You must add groups to each and every handset accordingly. No lines will be available to them unless part of the groups.
To add a group on a handset, press 5, 2 then press ADD to add the group. Press 01 for group 1, and ADD again if you wish to group it to 2 (02) and continue for lines 3, and 4 etc.
With grouping you can remove or add lines (groups) to handsets individually at any time.
(Ref #8) Adding a handset to a group (for broadcasting): On each handset, to add it to a group, or groups, press menu 5, 2, then ADD. You can have up to 7 groups. Group id’s are from 01 through 07.
(Ref #9) Recovering the original handset ID after having a phone repaired:
All phones sent in must be registered to our test base. This causes it lose the registration to your base.
Unless you deregistered the handset ahead of time from your base, your base still thinks that ID is still in use. For example if you have 4 handsets registered as ID 10, 11, 12, and 13 and you send in handset 12 for repair. When you reregister it, you will get ID 14 because it still thinks 12 is in use.
To get your handset registration back to ID 12 you must erase the base information for handset 12, which then frees it up for you to then use.
To erase a registration ID that is stored by the base unit, get an administrative handset (ID 10 or 11) and press Menu 9, 2, then 1 to choose which handset registration ID to clear. In our example it would be extension ID 12.
Now ID12 is clear and available as the next registration ID. The base unit gives ID’s to handsets in numerical order of free ID’s. You can now go to #3 and go through the normal handset registration process.