














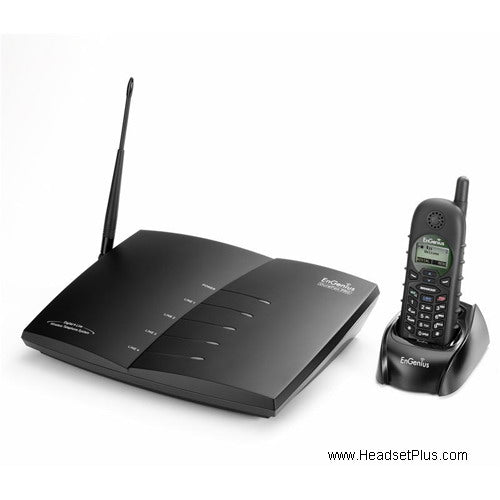














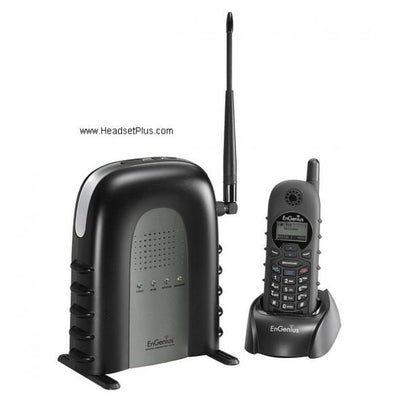
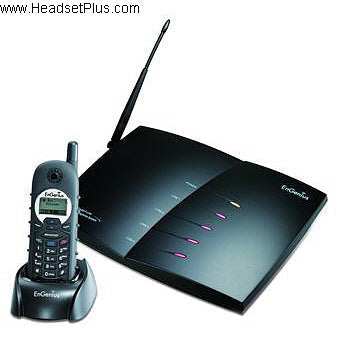
The EnGenius DuraFon Pro is a multi-line, multi-base wireless phone system built for large facilities — and its admin features (broadcast paging, handset grouping, line dedication, multi-base registration) go well beyond a standard cordless phone. This FAQ covers the questions that come up most once a system is deployed, plus the exact troubleshooting steps for registration and setup issues.
Key takeaways
- Up to 8 base units (IDs 00–07) and 90 handsets total, all registered to the primary base first.
- Broadcast paging works through line ports 3 and 4 only, using 2 of the base's 4 available time slots.
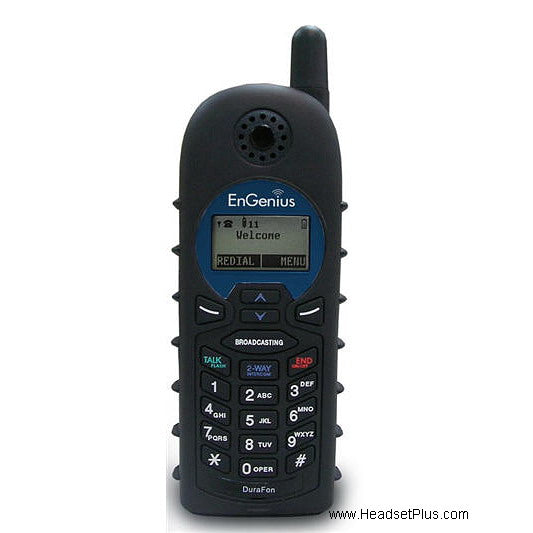
- The green-faceplate PRO handset is fully featured; the blue-faceplate DuraWalkie is radio/broadcast-only, with no line access.
- Handset grouping (up to 7 groups) lets you page or dedicate lines to specific sets of handsets, not just one at a time.
- Administrative handsets (IDs 10 and 11) are required for registration, grouping, and line-dedication changes.
PRO handset vs DuraWalkie: what's the difference?
The DuraFon Pro system uses two handset types, and they're not interchangeable in capability:
| PRO handset (green faceplate) | DuraWalkie (blue faceplate) | |
|---|---|---|
| Line/extension access | Yes — full phone functionality | No — cannot use any phone line |
| Receives incoming calls | Yes | No |
| Receives transferred calls | Yes | No |
| 2-way radio / broadcast | Yes | Yes |
| Speakerphone | Yes | No |
| Range (2-way/broadcast) | Same as DuraWalkie | Same as PRO handset |
If you can't tell them apart visually, removing the battery reveals the model and serial number. The EnGenius DuraFon 4x shares most of this platform but lacks two Pro-specific features: multiple base registration (the 4x is limited to a single base) and broadcast through a line port. The Pro also adds handset speakerphone capability.
How broadcast paging works
Broadcast paging lets one call reach all handsets — or a specific group of them — at once, and it's configured through line ports 3 and 4 only (lines 1 and 2 can't broadcast).
A configuration on the DuraFon Pro base that turns line port 3 or 4 from a standard phone line into a paging channel. When broadcast is enabled and someone dials into that line, an auto-attendant asks for a group number (or to page all handsets), then broadcasts the call to the selected handsets after a beep.[/definition>- Turning on broadcast for line 3 or 4: using an administrative handset (ID 10 or 11), press Menu 9, 2, choose the base ID (00 for primary, 01–07 for additional bases), then 1, and select line 3 or 4.
- Calling in to broadcast: dial into the line with broadcast enabled, follow the auto-attendant, and enter a group number (01–07) when prompted — or wait to broadcast to all handsets.
- Adding a handset to a broadcast group: on that handset, press Menu 5, 2, then ADD, then the group number (01–07). Handsets aren't part of any group by default.
Broadcast uses 2 of the base's 4 available time slots — one for the occupied line, one for the outgoing broadcast — so if 3 lines are already active, a line-4 broadcast won't work. And broadcasts don't take priority over incoming calls: if lines 1 and 2 are in use and line 3 gets an incoming call while a broadcast is active, the broadcast stops and the phones ring instead.
Myth
If someone broadcasts a page, I can reply directly through my PRO handset or DuraWalkie.Reality
You can't reply to a broadcast the way you would a normal call. On a PRO handset, a broadcast comes through as an incoming call and then drops — there's no reply path. The practical workaround is for the person broadcasting to state their extension in the page itself, so recipients can call them back directly. The DuraWalkie is even more limited: it can't access any phone line or extension at all, so its only communication path is 2-way radio to other DuraFon handsets (PRO or Walkie) in the same system.Registering handsets and adding base units
The DuraFon Pro supports up to 8 base units and 90 handsets total, but everything starts with the primary base.
Registering the first handsets (primary base, ID 00)
- Power up the base for at least 5 seconds.
- Locate the blue REG button near the antenna connection (not the RST button).
- Press and hold REG until all line lights illuminate, then release.
- On the handset, press Menu 6 (registration), then 1 (register), while the base's lights are lit.
- The display confirms registration and assigns an ID — 10 for the first handset, then 11, 12, 13, and so on.
Handset IDs 10 and 11 are automatically the "administrative handsets" — they're the only ones that can perform line dedication, grouping, auto-attendant configuration, and ID management.
Adding additional base units
All handsets must register to the primary base (ID 00) first. To add another base unit, you need an administrative handset (ID 10 or 11): press the REG button on the new base until all four line lights illuminate, then on the admin handset press Menu 8, 1 (add base) and choose an ID from 01–07. Every new or reset base defaults to ID 00, so it can't share that ID with the primary base — number and label each base unit as you add it.
Grouping and line dedication
By default, every incoming call rings every handset. Two features let you control that: dedicating a line to one specific handset, or grouping multiple handsets to share a line.
Dedicating a line to one handset
Using an administrative handset, press Menu, 9, 2, choose the base ID, then 2, and use the arrows to select the line and the handset ID it should ring. Note: dedicating one line to a handset doesn't remove that handset from any other lines still set to "all handsets" — you'd need to dedicate every line for fully exclusive direct-dial access to one handset.
Grouping handsets to a line
Grouping dedicates a line to a group number instead of a single handset, and then individual handsets are added to that group to gain access. A typical setup: Group 1 = Line 1 (programming # 01), Group 2 = Line 2 (02), and so on through Group 4 = Line 4 (04). No handset belongs to any group by default — to add one, press Menu 5, 2, then ADD, then the group number (01–07), repeating for each additional group. Groups can be added or removed from any handset at any time.
Resetting the base erases all registration, administrative changes, and line dedication — use the reset procedure only when necessary.
Troubleshooting reference
If the system isn't behaving as expected, start with a power reset on the affected handset and base station. If that doesn't resolve it, the numbered procedures below cover the most common configuration issues. Note that resetting a handset or base requires re-registration afterward.
Resetting a handset
Press Menu, 5, star, then 1 (clear all), then power-cycle the handset. This clears the logbook and is safe to use even when no problems are occurring.
Deregistering a handset
Follow the same steps as registration (above), but press Menu 6, 2 on the handset — it will display "Deregister" and its ID is removed from both the handset and the base. If the handset can't be deregistered because it's damaged, see "Recovering a handset ID" below once it's been repaired.
Base won't enter registration mode
Confirm only the power light is on. Power-reset the base station, then reset the base and try registering again.
Resetting the base (required if no administrative handset exists)
Power up the base for at least 5 seconds until line lights flash. Locate the RST button (near the REG button, marked with the letters RST) and press it with a pen or paperclip until lines 1 and 2 light up, then release — they'll go out after a few seconds. Power-cycle the base by unplugging and replugging it. Registration will restart at handset ID 10.
Recovering a handset's original ID after a repair
Any handset sent in for repair gets registered to a test base, which loses its registration to your system. If you didn't deregister it first, your base still considers that ID "in use" — so re-registering the repaired handset assigns it the next free ID instead of its original one. To reclaim the original ID (for example, ID 12), use an administrative handset and press Menu 9, 2, then 1, and select the ID to clear. Once cleared, that ID becomes available again, and you can proceed through the normal registration steps to reassign it.
What's the difference between a DuraFon Pro handset and a DuraWalkie?
The green-faceplate PRO handset has full phone functionality — it can answer incoming calls, receive transfers, and use the speakerphone. The blue-faceplate DuraWalkie is radio/broadcast-only: it can't access any phone line, answer calls, or receive transfers. Both have the same 2-way radio and broadcast range.
How many base units and handsets does the DuraFon Pro support?
Up to 8 base units (IDs 00 through 07) and up to 90 handsets total. All handsets must register to the primary base (ID 00) first; additional base units are added afterward using an administrative handset (ID 10 or 11).
How does broadcast paging work on the DuraFon Pro?
Broadcast paging is enabled on line port 3 or 4 through an administrative handset. Once enabled, dialing into that line reaches an auto-attendant that asks for a group number or broadcasts to all handsets. Broadcast uses 2 of the base's 4 time slots, so it's unavailable if 3 lines are already in use, and incoming calls take priority over an active broadcast.
Can a DuraWalkie receive incoming calls or transfers?
No. The DuraWalkie cannot receive incoming calls or transferred calls from a DuraFon Pro handset — it's limited strictly to 2-way radio communication and receiving broadcasts through the base unit's broadcast port.
What do I do if a repaired handset comes back with the wrong ID?
Repaired handsets are registered to a test base during service, which loses their registration to your system. If the original ID wasn't deregistered beforehand, the base still considers it in use, so re-registering assigns a new ID instead. Use an administrative handset (Menu 9, 2, then 1) to clear the original ID from the base's records, then re-register the handset to reclaim it.
The DuraFon Pro's admin features — broadcast, grouping, multi-base registration — take some initial configuration, but once set up they cover a large facility with a level of paging and line-management flexibility standard cordless phones can't match. For the full model lineup and how the Pro compares to the 1X, 4X, and PSL, see our industrial long-range cordless phone guide, or call our team at 877-999-3838 for deployment help.
Comments (0)